Safe-to-Wake Light, Part 3: Firing Photons
January 07, 2020
Today, Squishy Kitty donated his booty to science.
We were faced with a logistical problem: We could remove SK from his base and place him over our electronics… but then Squishy Kitty would be simply a tent on top of them. Picking him up would mean disembodying him, and ghosts are not welcome guests in the bedrooms of children.
Katie said that, in order to keep Squishy Kitty whole, we needed to repurpose his existing base. Remove the old electronics, put some new electronics in there, and then put Kitty back together again. Only now he’ll have a new “tail,” because he’ll no longer be battery-powered.
It was a sound idea, and after receiving consent from Squishy Kitty (“No means no,” boys and girls), we engaged in some proctology.
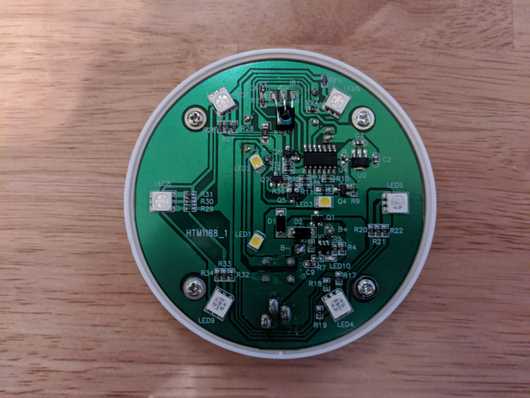
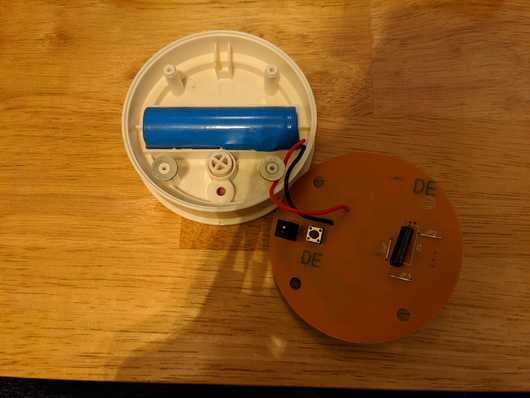
As you can see, there are four screws securing the circuitry to Kitty’s base. We unscrewed them to find:
Well, not much. Looks like there are three things under there:
- A Switch, to turn it on and off
- A power receptacle, for charging the battery
- A battery
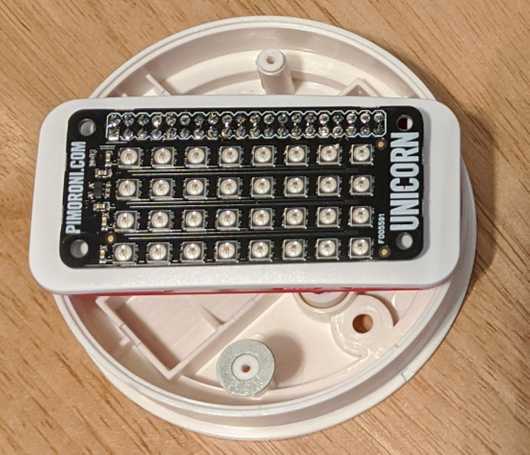
A quick tug on the battery popped it out, and we were left with just the base. Let’s see if we can fit the Pi in there:
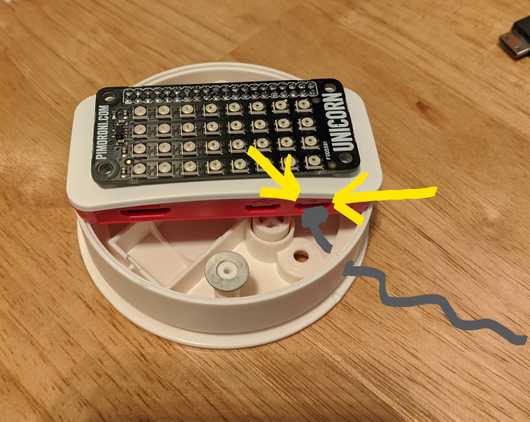
OK, it doesn’t quite fit inside, but we should still be able to fit Kitty over it pretty easily. We’ll also need to come up with a way to secure the Pi to the base; A zip-tie is a little less permanent then gorilla glue, but both are viable options in ready supply.
Speaking of logistics, we’re also going to have to get power into the Pi somehow. Power goes to the rightmost port, and this informs where Kitty’s “tail” will pop out.
Before making any permanent alterations to Kitty’s backside, let’s make sure that our electronics are in good shape.
Pi Setup
After plugging all the things into the Pi and waiting for it to boot up, we performed the following operations to allow ourselves to work on it remotely:
passwd- to change the default password-
sudo raspi-config- to enter the Raspberry Pi setup screen, where we made the following changes- Enable SSH server
- Set locale to en-US_utf8
- Turn on and configure the wifi
A quick ping google.com showed us that we were on the network, and it was time to move back to my PC and connect over SSH.
I ran ifconfig to get the IP address of the Pi, and then from my development PC, I ssh’d into the Pi with no issues.
Next, I took care of some personal housekeeping on the Pi; stuff like setting up SSH keys and installing tmux, git, and vim (the Holy Trinity of developer command line tools).
After housekeeping was complete, I rebooted the Pi, and it was time to see if we could light things up!
It looks like Python 3 came installed on the system, but pip did NOT! So we have another prereq to install:
sudo apt-get install python3-pipOnce this completed, it was time to install the unicorn-hat libraries from the official repo. I ran the following:
curl -sS https://get.pimoroni.com/unicornhat | bashFollowing the prompts involved lots of consent (No still means No though), after which you will be presented with a final:
Some changes made to your system require
your computer to reboot to take effect.

Would you like to reboot now? [y/N]
One final consent and 2 minutes of rebooting later, we were ready to light things up!
Photon Firing
After the Pi came back up I noticed a new Pimoroni folder in my home directory.
It appeared to be an exact clone of the official repo, and inside, there was an examples folder.
On a whim, I decided to run the following:
$ python3 ~/Pimoroni/unicornhat/examples/rainbow.pyWhere I got the following:
Can’t open /dev/mem: Permission denied
So I tried again as the superuser:
$ sudo python3 ~/Pimoroni/unicornhat/examples/rainbow.pyColors! Wow! Awesome! Looks like our soldering job was successful 👍 And we didn’t even need to write any code! It was just there!
I wish I had more to say about it, but I don’t. Programming can often be anti-climactic like that. You prep, prep, do some prep, and then the actual thing you’ve been working towards just falls in your lap.
Next Time
In our next post, we’ll install the Oracle JDK (compiled for ARM processors) on our Pi, and we’ll start getting some Clojure running on it. Then, we’ll see what it takes to get different colored lights firing from Clojure rather than Python.
Stay tuned!


